வட்டார போக்குவரத்து கழகத்தின் (RTO) ஆன் லைன் சர்வீஸ்


imageநாட்டின் மிக பெரிய லஞ்ச ஊழல் நடமாடும் வட்டார போக்குவரத்து கழகத்தின் (RTO) ஆன் லைன் சர்வீஸ் செயல்ப்படும்.


ஒவ்வொரு RTO அலுவுலகத்திலும் இப்பொழுது என்ன நம்பர் சீர்யல் ஓடுகிறது TN - 13 - XX - XXXX , என்ன வி ஐ பி நம்பர் இருக்கிறது, லைசன்ஸ் ஆன்லைன் அப்ளிகேஷன், உங்களின் டிரைவிங் லைசன்ஸ் தற்போதைய நிலமை, ஒவ்வொரு வாகனத்திற்க்கும் ரோடு டாக்ஸ் ஆன்லைனில் செலுத்துதல், கன்டக்டர் உரிமம் புதுபித்தல், புது வாகன் ரிஜிஸ்ட்ரேஷன் அப்ளிகேஷன், ஒட்டுனர் உரிமம் ரோடு டெஸ்ட் ஆன்லைன் அப்பயின்ட்மென்ட், மற்றூம் லோன் ஹைபோதிகேஷன் ஆர் சி புக்கில் இருந்து எடுக்க எந்த ஆர் டி ஓ ஆபிசுக்கு நீங்கள் செல்ல வேண்டும் மற்றூம் வண்டி ரிஜிஸ்ட்ரேஷன் டீட்டேயில்ஸ் எல்லாம் இனிமே நம் கையில், இனிமே புரொக்கர் வேண்டவே வேண்டாம், இந்த சேவை தான் நாம் எதிர்பார்த்த சேவை...........


1.ஓட்டுனர் பழகுனர் உரிமம் மனு முன்பதிவு - Learners License Online Application - http://tnsta.gov.in/transport/appointment.do?_tq=890d1045ac27d24cb2b1732731085482


2.தொடக்க வாகன பதிவு எண் - Today What Number Series in your RTO - http://tnsta.gov.in/transport/rtoStartNoListAct.do


3.வாகன வரி விகிதங்கள் - Tax Rates Details - Vehicle Wise - http://www.tn.gov.in/sta/taxtables.html


4.நிர்வாக எல்லை அறிய - Know your RTO by Postcode - http://tnsta.gov.in/transport/know_RtoLoad.do


5. ஓட்டுனர் உரிமம் டிரைவிங் லைசன்ஸ் ஆன் லைன் அப்பயின்ட்மென்ட் - Online Appointment Booking for Road Test - http://tnsta.gov.in/transport/appointment.do?_tq=51da2bc262553b8d4f4adb3a40eb2af1


6.பொது நிர்வாக விசாரிப்புகள் - General Enquiries - http://tnsta.gov.in/transport/contacts.do

China Mobile Phones Secret Codes


The following Mobile Phones codes works with various China mobile Phones such as Alkatel, Sigmatel, Carbon, GFive, and more such China Mobile phones.
image
–Default user code : 1122, 3344, 1234, 5678
–Engineer mode : *#110*01#
–Factory mode : *#987#
–Enable COM port : *#110*01# -> Device -> Set UART -> PS Config -> UART1/115200
–Restore factory settings : *#987*99#
–LCD contrast : *#369#
–Software version : *#800#
–Software version : *#900#
–Set default language : *#0000# Send
–Set English language : *#0044# Send
–Set English language (new firmware) : *#001# Send

Ethernet Cable - Color Coding Diagram


The information listed here is to assist Network Administrators in the color coding of Ethernet cables. Please be aware that modifying Ethernet cables improperly may cause loss of network connectivity. Use this information at your own risk, and insure all connectors and cables are modified in accordance with standards. The Internet Centre and its affiliates cannot be held liable for the use of this information in whole or in part.
T-568A Straight-Through Ethernet Cable
The TIA/EIA 568-A standard which was ratified in 1995, was replaced by the TIA/EIA 568-B standard in 2002 and has been updated since. Both standards define the T-568A and T-568B pin-outs for using Unshielded Twisted Pair cable and RJ-45 connectors for Ethernet connectivity. The standards and pin-out specification appear to be related and interchangeable, but are not the same and should not be used interchangeably.
T-568B Straight-Through Ethernet Cable
Both the T-568A and the T-568B standard Straight-Through cables are used most often as patch cords for your Ethernet connections. If you require a cable to connect two Ethernet devices directly together without a hub or when you connect two hubs together, you will need to use a Crossover cable instead.
RJ-45 Crossover Ethernet Cable
A good way of remembering how to wire a Crossover Ethernet cable is to wire one end using the T-568A standard and the other end using the T-568B standard. Another way of remembering the color coding is to simply switch the Green set of wires in place with the Orange set of wires. Specifically, switch the solid Green (G) with the solid Orange, and switch the green/white with the orange/white.
Ethernet Cable Instructions:
  1. Pull the cable off the reel to the desired length and cut. If you are pulling cables through holes, its easier to attach the RJ-45 plugs after the cable is pulled. The total length of wire segments between a PC and a hub or between two PC's cannot exceed 100 Meters (328 feet) for 100BASE-TX and 300 Meters for 10BASE-T.
  2. Start on one end and strip the cable jacket off (about 1") using a stripper or a knife. Be extra careful not to nick the wires, otherwise you will need to start over.
  3. Spread, untwist the pairs, and arrange the wires in the order of the desired cable end. Flatten the end between your thumb and forefinger. Trim the ends of the wires so they are even with one another, leaving only 1/2" in wire length. If it is longer than 1/2" it will be out-of-spec and susceptible to crosstalk. Flatten and insure there are no spaces between wires.
  4. Hold the RJ-45 plug with the clip facing down or away from you. Push the wires firmly into the plug. Inspect each wire is flat even at the front of the plug. Check the order of the wires. Double check again. Check that the jacket is fitted right against the stop of the plug. Carefully hold the wire and firmly crimp the RJ-45 with the crimper.
  5. Check the color orientation, check that the crimped connection is not about to come apart, and check to see if the wires are flat against the front of the plug. If even one of these are incorrect, you will have to start over. Test the Ethernet cable.
Ethernet Cable Tips:
  • A straight-thru cable has identical ends.
  • A crossover cable has different ends.
  • A straight-thru is used as a patch cord in Ethernet connections.
  • A crossover is used to connect two Ethernet devices without a hub or for connecting two hubs.
  • A crossover has one end with the Orange set of wires switched with the Green set.
  • Odd numbered pins are always striped, even numbered pins are always solid colored.
  • Looking at the RJ-45 with the clip facing away from you, Brown is always on the right, and pin 1 is on the left.
  • No more than 1/2" of the Ethernet cable should be untwisted otherwise it will be susceptible to crosstalk.
  • Do not deform, do not bend, do not stretch, do not staple, do not run parallel with power cables, and do not run Ethernet cables near noise inducing components.
Basic Theory:

By looking at a T-568A UTP Ethernet straight-thru cable and an Ethernet crossover cable with a T-568B end, we see that the TX (transmitter) pins are connected to the corresponding RX (receiver) pins, plus to plus and minus to minus. You can also see that both the blue and brown wire pairs on pins 4, 5, 7, and 8 are not used in either standard. What you may not realize is that, these same pins 4, 5, 7, and 8 are not used or required in 100BASE-TX as well. So why bother using these wires, well for one thing its simply easier to make a connection with all the wires grouped together. Otherwise you'll be spending time trying to fit those tiny little wires into each of the corresponding holes in the RJ-45 connector.

How to Speed up your Computer


Perform a disk clean up.
Remove unwanted/unneeded software which may be the reason for slowdown
Defragment Your Computer
Stop unwanted Start-Up programs
    sfsadfsadf

    How To Connect Two Monitors in One Computer


    In many professions, including graphic design, architecture, communications, accounting, engineering and video editing, the idea of two or more monitors being driven from one machine is not a new one. While in the past, it has meant multiple graphics adapters and specialized software, it was common for engineers to have at least two, if not more, displays to enhance productivity.

    Now that multiple-monitor setups are more budget-friendly, it is not uncommon to see a wide range of business professionals using multiple monitors to increase visual area. This advantage helps promote the concept of a paperless office by increasing the quantity of simultaneous media that can be viewed digitally, although the advantage of viewing two documents simultaneously is also feasible on many larger widescreen monitors.


    What is Email Marketing?


    Email Marketing is the process of using emails to generate income. This can be done by sending out sales messages to individuals on a one-to-one basis. However, to exploit the leverage capabilities of the internet, email marketing can be made much more effective by using an Autoresponder.

    Email marketing using autoresponders relies on the marketing building up a list of people's email addresses. Marketing messages are then sent to this list. Each message will include one or more links to web pages where products are for sale.

    There are two ways that emails can be sent using an autoresponder. First individual emails can be crafted using effective copywriting techniques and then sent out on an ad hoc basis to all the people on a list. They can also be sent to a sub-set of the people on a list. For example, they could be sent only to existing customers or only to people living in the US and Canada.

    The second way that email marketers use autoresponders is to set up a sequence of emails that get sent out in series after a pre-set time interval. For example, the first email message in a series could be sent out 1 day after someone subscribes to a newsletter and the second message in a series could be sent out 4 days after they subscribed and so on.

    The process of reminding people about marketing offers by using emailing systems is known to boost profitability substantially.

    There are also two other features of email marketing that make it highly attractive to businesses.

    The whole process is highly measurable. Good emailing systems will report back to you how many people opened the emails you sent out and how many clicked the links in them. You can also split the messages sent to a list into several groups to find out which email generated the most profit.

    The cost of emailing is negligibly small because sending emails effectively costs nothing. There is however a time cost in writing good emails in the first place.

    It is important to comply with local emailing laws when using email marketing and specifically to make sure that you comply with the CAN-SPAM laws in the US.

    What is an Internet Conversion?


    Conversion is the marketing process of getting people on your site to do what you want them to do such as subscribing to a list, making a purchase or visiting another speciifc part of a website. In other words it is a key measure of any internet-based business. The more sales conversions you are getting the better. Likewise if you a trying to build a list to market to, the number of subscribers you can get will directly impact on your ultimate profitability.

    For the vast majority of websites conversion rates are extremely poor and one reason for this is that they are usually designed to look good rather that to act as direct marketing machines.

    Conversion levels on sites are effected by a vast array of things including the wording, or copy, on the site, the images that are used on the site, whether there are any Testimonials on the site and critically the source of traffic.

    A strongly converting website will make it very easy for the visitor to know what to do next and will limit other options. Good websites that convert well are also usually the result of targeted traffic, effective copy and continuous testing. There is little or no point in driving untargeted traffic to a website and expecting it to convert well which is why the source of web traffic is also key. If you sell epoxy resin it is very unlikely that an internet user taken at random will be interested in buying some.

    A number of marketing tools can increase the conversion rates of a site such as autoresponders. These market to sales prospects automatically by sending out sales messages via email. Over time it is usually found that, provided the sales messages are well crafted, the overall sales rate of a website will increase if an autoresponder is used - although very few businesses make use of them.

    The facts are that people who use autoresponders can drive up their visitor values which makes them a lot more profitable.

    How to Earn from the internet?


    Where's George?There are several ways to earn from the internet. But you have to remember that there is no special trick or quick rich set up to do this. If anyone says that they have a product that will let you earn while just sitting around after buying their program, then most likely its a scam. To earn from the internet takes effort and time as well as knowledge on how use the internet for your advantage.

    Some ways to earn from the internet are the following:

    Blogging - this would be making post from time to time. You can place ads in your blog and earn from them.

    Paid to click - there are several sites that pays you when you click some ads. Though they do not pay that high, but this is the easiest way since all you have to do is click.

    Affiliate Marketing - certain sites will accept you as a member to become an affiliate marketer. You don't need to have a product of your own to sell. You simply sell the products of others and earn commission for every sale.

    Article Writing - several sites pays you to write articles. You simply submit to the site articles that you write basing on different categories and once accepted they will pay you depending on how good your article is.

    There are still a lot of ways to earn from the internet. Basically, what is needed is your time and effort. Just like any work, you need to devote time and effort to be successful.

    Reset ML-2240 and ML-1640 : Simple package download


    image

    I will give you the download link and how to do this. The Simple package contains only the patched version of firmware so you only need to do the final step as I did.


    But before you begin, Please read the facts carefully:


    The firmware file included in the simple package are the patched version.


    I’ve run the patches for a Samsung ML-1640 and it works fine till now, but I never test the fix for ML-2240, however I also supply the file because it’s provided by the same patches.


    My operating system is Windows XP SP2. image


    • How to do with the Simple Package?


    • You only need to run the firmware down-loader (downlXX40.bat), DO NOT turn off or disconnect the printer/computer during this process. That should be it, now press any key to exit the downloads, turn off your printer for about 10 seconds and turn it back on.

    •  

    • Simple Package for ML-1640

    • You will find 3 files in this package:

      FIX_ML1640_V1010083.fls is the patched firmware

      • downl1640.bat is the firmware downloads (to printer)
      • usbprns2.exe is the tools run by the downloads

      Click here to download Simple Package for ML-1640

    •  

    • Simple Package for ML-2240

    •  

    • You will find 3 files in this package:

      • FIX_ML2240_V1010083.fls is the patched firmware
      • downl2240.bat is the firmware downloads (to printer)
      • usbprns2.exe is the tools run by the downloads

      Click here to download Simple Package for ML-2240

      Do Drop your comments and don’t forgot to subscribe our blog below.

    Reset ML-1640 and ML-2240 : Raw Package download


    image

    I will give you the download link and how to do this. The Raw Package contains the original firmware upgrades from Samsung with the patches and firmware downloads. With this package you’ll need to run the complete steps as I did.


    But before you begin, Please read the facts carefully:


    The firmware upgrades included in the raw package are official version downloaded from SAMSUNG website.


    I’ve run the patches for a Samsung ML-1640 and it works fine till now, but I never test the fix for ML-2240, however I also supply the file because it’s provided by the same patches.


    My operating system is Windows XP SP2.


    How to do with the Raw Package?

    Please follow these steps if you use the Raw Package:


    Extract the package, by default it will go to a new folder with the same name as the package

    Run the official firmware upgrades (ML-XX40 _V1.01.00.83.exe)


    Choose which connection is used for the printer (USB/Network), this printer model is only available with USB connection.

    image
    See the temporary folder used for the firmware on 2nd panel “Select Downloaded Firmware” in File Name field. Open the specified folder and copy the specified file name (with fls extension) to the package folder.


    Now close the firmware upgrades.

    Run the firmware patches (fixXX40.bat) and you will find new firmware file in the same folder with prefix “FIX_”, press any key to exit the patches.

    Make sure your printer is turned on and is properly connected to your computer.


    Run the firmware down-loader (downlXX40.bat), DO NOT turn off or disconnect the printer/computer during this process.

    That should be it, now press any key to exit the down-loader, turn off your printer for about 10 seconds and turn it back on.

    • Raw Package for ML-1640

    •  

    • You will find 5 files in this package:

    • ML-1640_V1.01.00.83.exe is the official firmware upgrade

      downl1640.bat is the firmware downloads (to printer)
      fix1640.bat is the firmware patches
      fixml40.exe is the tools run by the patches
      usbprns2.exe is the tools run by the downloads

    • Click here to download Raw Package for ML-1640

    •  

    • Raw Package for ML-2240

    •  

    • You will find 5 files in this package:

    • ML-2240_V1.01.00.83.exe is the official firmware upgrade

      downl2240.bat is the firmware downloads (to printer)

      fix2240.bat is the firmware patches

      fixml40.exe is the tools run by the patches

      usbprns2.exe is the tools run by the downloads 

    நானா இ-மெயில் அனுப்பினேன்?


    image திடீரென உங்கள் நண்பர்கள் போன் செய்து, உங்கள் கம்ப்யூட்டரிலிருந்து, தேவையற்ற மெயில்கள் வந்துள்ளதாகவும், அது போல அனுப்ப வேண்டாம் என்றும் சொல்வார்கள். விபரம் தெரிந்த நபர்கள், உங்கள் இமெயில் அக்கவுண்ட்டிலிருந்து, நீங்கள் அனுப்பாமலேயே சில மெயில்கள் வருவதாகக் குற்றம் சாட்டுவார்கள். கனிவுள்ளவர்களோ, இது போல வருகின்றன; உன் கம்ப்யூட்டரை வைரஸ் மற்றும் ஸ்பேம் மெயில், மால்வேர் புரோகிராம் செக் செய்திடச் சொல்வார்கள்.


    இது போன்ற சூழ்நிலையில் என்ன நடக்கிறது? என்று நீங்கள் விழிப்பீர்கள். ஏனென்றால், நண்பர்கள் குறிப்பிடும் அந்த மெயில் எல்லாம், உறுதியாக நீங்கள் அனுப்பவில்லை என்று தெரியும். ஏன் அது உங்கள் கம்ப்யூட்டரால் கூட அனுப்பப்பட்டிருக்காது. உங்கள் நண்பர்கள் வட்டத்தில் ஒருவரின் கம்ப்யூட்டர் ஸ்பேம் மெயில் அல்லது வைரஸ் அல்லது மால்வேர் புரோகிராமினால் பாதிக்கப்பட்டு, அது உங்கள் இமெயில் அக்கவுண்ட் மூலமாக இந்த ஸ்பேம் மெயில்களை, அட்ரஸ் புக்கில் உள்ள அனைவருக்கு இதனை அனுப்பி இருக்கலாம். அல்லது நீங்கள் அறியாத ஒரு நபர், உங்கள் இமெயில் அக்கவுண்ட்டினையே ஹைஜாக் செய்திருக்கலாம்.


    இதற்கான தீர்வு என்ன? image

    முதலில் உங்கள் இமெயில் அக்கவுண்ட்டினை நீங்கள் அணுகித் திறந்து பார்க்க முடிகிறது என்றால், அதன் பாஸ்வேர்டை உடனே இன்னும் கடுமையான பாஸ்வேர்டாக மாற்றவும். உங்களால் உங்கள் இமெயில் அக்கவுண்ட்டினை, வழக்கமான பாஸ்வேர்ட் பயன்படுத்தித் திறக்க முடியவில்லை என்றால், உங்கள் இமெயில் அக்கவுண்ட் ஹைஜாக் செய்யப்பட்டுள்ளது என்று பொருள். யாரோ ஒருவர், உங்கள் அக்கவுண்ட்டின் பாஸ்வேர்டைக் கண்டுபிடித்து, பாஸ்வேர்டினை மாற்றி, இது போல ஸ்பேம் மெயில்களுக்கெனப் பயன்படுத்திக் கொண்டுள்ளார். ஒரு சிலர், இது போல இமெயில் ஹைஜாக் செய்த பின்னர், அதன் இமெயிலுக்கு உரியவர் பெயரில், அவரின் உற்ற நண்பருக்கு, தான் டில்லி வந்து மாட்டிக் கொண்டதாகவும், பணம் தேவை எனக்கூறி ஏதேனும் ஒரு அக்கவுண்ட் எண்ணுக்கு பணம் அனுப்ப வேண்டிக் கொள்வார். இதில் அனைத்துமே ஏமாற்று வேலையாக இருக்கும். இது போல இமெயில்கள் ஹைஜாக் செய்யப்படுகையில், உடனே உங்களுக்கு இமெயில் சேவையினை வழங்குபவரைத் தொடர்பு கொண்டு, உடனடியாக உங்கள் அக்கவுண்ட்டினை மீட்டுத் தருமாறு கேட்டுக் கொள்ளவும்.


    இலவசமாக இமெயில் தரும் பிரபல நிறுவனங்கள் எனில், அவர்கள் தளத்தில் இதற்கான வழி தரப்பட்டிருக்கும். சில பிரபல இமெயில் அக்கவுண்ட்டில் இது போல ஏற்பட்டால் நீங்கள் தொடர்பு கொள்ள வேண்டிய தள முகவரிகள் கீழே தரப்பட்டுள்ளன.

    image
    ஜி மெயில்: Click here for Google Mail

    யாஹூ: Click here for Yahoo Mail

    ஹாட்மெயில்: Click here for Hot Mail


    ஆனால், பாஸ்வேர்ட் கொடுத்து அக்கவுண்ட்டில் நுழைய முடியும் என்றால், அந்த அக்கவுண்ட் ஹைஜாக் செய்யப்படவில்லை; ஆனால் உங்களுடைய பாஸ்வேர்டினைப் பயன்படுத்தி யாரோ விளையாடுகிறார்கள் என்று பொருள். உடனே மேலே குறிப்பிட்டபடி, பாஸ்வேர்டினை மாற்றவும்.

    Windows OS Startup issues & solution


    All most all of the people are currently using Windows XP Operating system itself. Being a users it is better to know about the configuration settings of the OS.


    Ample knowledge on Regedit & MS-Config is a bit essential for everybody.


    1.  After successful installation of many programs like yahoo messenger, Google talk, Skype , Nero, real one player and many more , default they comes to startup which takes a lot of memory (RAM usage) which results in the decrease of system performance also. In order to solve such issues one must use MS-CONFIG

    msconfig
    Steps:
    START--> RUN --> MS-CONFIG --> STARTUP tab --> Remove the check box of the concerned application and "apply". Better to restart the system after applying the modification.


    This disables the applications in startup which helps in saving memory.


    2.  Most of the software applications like Oracle, Hyperion, Visual studio are registered with the system files. So uninstalling the application is not completely removing from the system as they are registered with system files. So better remove it from windows registry.

    Run folder
    Steps :
    START-->RUN-->  REGEDIT--> Search for the required software component and delete it from right side of the panel. Be careful before deleting as they are all sensitive components of the system.
    We can enable & disable the usage of USB and other ports using this regedit. we can manage the whole operating system using this regedit.


    3.  Better to use windows XP rather than Vista as it requires more memory (RAM) . For the people who are interested in Vista Environment there are some themes available in the internet where the environment appears as VISTA in the XP itself. But it also use more memory (RAM) but not as vista.

    5 Tips to Recover Data from a Crashed Computer


    The hard drive has the shortest life expectancy of all components, but when it inevitably fails it’s always when you least expect it.Crashed Computer


    It’s an inevitability, and it always happens when you’re least prepared – the hard drive crash. Sure, you might notice it’s taking a bit longer to boot, or there’s an occasional click that just doesn’t sound right, but it’s still a surprise the day your computer fails to boot.


    How do you get your data off that hard drive once it’s no longer able to boot? Is it still possible? This depends on what exactly went wrong with your drive. It is safe to assume, however, that will the proper method, you will be able to retrieve at least part of your lost data.


    Below are five different methods for getting documents, pictures, and other important files off a crashed hard drive.


    1. Use an External Case
    This method is the most simple available, and for many people it is also the solution they need. Simply purchase an external hard drive case that allows you to plug your hard drive into a computer with a standard USB cable. Remove the crashed hard drive from your computer and carefully insert it into the external case (make sure you ground yourself before touching it), then plug it into a different system and try to open the drive. There’s a good chance you’ll be able to navigate into your documents and other folders and copy them onto a different hard drive.


    2. Use a LiveCD
    Don’t have access to a second computer for doing as you please? This method will be ideal, then. You’ll need to get temporary access to a computer with Internet and a DVD burner. Download a Linux LiveCD – Damn Small Linux is the smallest, but also has issues mounting hard drives. The most simple for an average computer user would be Puppy Linux. It has a larger file size, but should recognize your drive.


    Burn the Live CD ISO to a CD and insert it into your computer (the one with the crashed hard drive). Restart the computer and when it the computer logo appears, press F2 (or whatever key for your system) to enter BIOS. Change the boot sequence to CD first, Save and then Exit.


    The Live CD will start, simply follow the directions on the screen–don’t worry, nothing is being done to your hard drive. The OS will start, and you should see your hard drive mounted on the desktop–something like “60GB”, etc. Plug in a second drive and copy and paste the folders over.


    3. Data Recovery Software
    Do the above solutions have your head spinning? If you want something a little less complicated, you may want to give recovery software a go. There are a number of different free recovery tools available, and you may be one of the lucky users who have success with the programs.


    There are a large number of programs available, but the quality of each varies. A good place to start would be Data Disc Recovery–it’s free, easy to use, and works on crashed drives (it can also retrieve deleted files and others). If one doesn’t work, try a different one.


    4. Freeze It
    This method surprises many, but it actually does work (depending on what happened to the drive). The idea is that freezing it will constrict loose parts long enough for the drive to work properly. Make sure you have a computer ready to plug the drive into and an external case. Place the hard drive into a baggy, seal it tightly, and put it in the freezer overnight. The next day, remove it from the baggy and put it in the external drive case. Transfer the data from the drive before it warms too much and crashes again.


    5. Get a Pro
    If all else fails, you either have to accept that the data is gone or, if the data is really important, take the hard drive to a professional. It will be expensive, but there’s a good chance a pro will be able to retrieve some of the data for you.

    உங்கள் செல்போன் ஒரிஜினலா?


    Spectrum Mobiles Londonஇந்திய அரசாங்கத்தால் கடந்த நவம்பர் மாதம் இறுதியோடு செல் போனில் IMEI (International Mobile Equipment Identification) எண் இல்லாத அல்லது போலியான IMEI எண்களை உடைய போன்களுக்கான சேவை நிறுத்தப்படும் என்ற ஆணை பிறப்பிக்கப் பட்டது. ஆனால் இது எந்த அளவிற்கு செயல்படுத்தப் பட்டுள்ளது என்பதைப் பற்றிய தகவல் என்னிடம் இல்லை.
    குறைந்த விலைக்கு அதக வசதிகளுடன் விற்பனைக்கு வருகின்ற சைனா மொபைல்களில் IMEI எண் போலியானதா என்கிற சந்தேகம் வருவது நியாமானதுதான். IMEI எண் என்பது குறிப்பிட்ட மொபைல் போன் தயாரிப்பாளர்களால் குறிப்பிட்ட மாடல் போன்களின் எண்ணிக்கை மற்றும் பயனாளர்களின் எண்ணிக்கையை கணக்கெடுக்க உருவாக்கப் பட்டதாக இருக்கலாம். இது 15 இலக்க எண்ணாகும். நமது செல்போனில் சரியான IMEI எண் உள்ளதா எனக் கண்டறிய என்ன செய்யலாம்.


    உங்கள் மொபைல் போனில் *#06# என டைப் செய்தால் உங்கள் போனிற்க்கான 15 இலக்க IMEI எண் திரையில் வரும். இதை குறித்து வைத்துக் கொள்ளுங்கள். பிறகு IMEI என டைப் செய்து ஒரு ஸ்பேஸ் விட்டு உங்கள் IMEI எண்ணை டைப் செய்து 53232 என்ற எண்ணிற்கு SMS செய்தால் Success என பதில் வந்தால் உங்கள் போன் ஒரிஜினல்.
    ஒரு சில சமயங்களில் இது சரியாக வேலை செய்யாமல் போனால், இதை ஆன்லைனிலும் சோதிக்க சுட்டி கீழே தரப்பட்டுள்ளது. ஆன்லைனில் உங்கள் போனை குறித்த மேலதிக விவரங்களும் தெளிவாக தரப்படுகிறது.


    Click here to Check your IMEI


    Click here to Check your IMEI

    Simple tutorial to Secure your LAN


    2010-05-16: Protectin' Ur IntertubezIn this short tutorial where you will come to know the basics of LAN security. As far as LAN security is concerned firewalls, anti-viruses play an important role in it.Viruses can affect your pc or your entire network. Hence it is very important to ensure that your connection is secure.

    Security of LAN is sub-divided in two parts.
    * Manual security
    * Tools security.

    As far as manual security is concerned, it takes into consideration pen drive, CD, DVD,etc. Ensure that these stuffs you are going to insert are pre scanned and does not contain any viruses. This can harm your entire network. Secondly do not allow any of your friend to take an access of your server, or do not revel any passwords that you have set for firewalls and your TCP ports. This could take away your entire privacy. With tools security play a most important part in LAN security.

    Tools like Port Monitors & Trojan Cleaners should be given a big existence in LAN security.Port monitors are programs that you install on your computer. They are simpler than the Personal Firewalls in that their main purpose is to detect incoming port scans on your computers. Some also shut down an unauthorized scan, but for that capability you usually need to use a firewall. Trojan cleaners look for Back Orifice and Net Bus.
    IMGP9552.JPG

    Two common and most important tools
    * Nukenabber
    * The Cleaner
    are specially meant to have a look on the TCP and UDP ports. This look after the attack on the system over internet.A total of 50 ports can be looked after at the same time.

    SAMSUNG SCX-4200 reset to refill old Toner


    SCX-4200When the level is near to the end, the printer gives error and stops.


    In other words, it disallow you to use all the ink; in addiction of this, you can’t use compatible toners because they doesn’t have the chip, so the printer doesn’t restart even after you replace it.


    The complete procedure to enter the service mode of your Samsung SCX-4300 printer, flash it and reset the ink counter.


    DISCLAIMER: as usual, I am not responsible for any damage you can cause with this procedure!download_button

    • First of all, download the software pack: SCX-4300.rar and extract it in your hard disk (C:\), creating a C:\scx-4300 folder;
    • Now fire up a command line window: click Start -> Execute…, type CMD and press enter;
    • In the black command line window type cd / and press enter; then type cd scx-4300 and press enter again;
    • Type fix4300.exe SCX4300_V1.13_Fact_romdl.hd and press enter; this script will create a new file in the folder, named FIX_SCX4300_V1.13_Fact_romdl.hd. This file is created starting from the unique serial of your printer, and it will replace the original one in your printer flash memory.
    • Let’s go to service mode: press the following buttons on your SCX-4300 panel:MENU
    • COPIES
      <
      >
      MENU
      >

    • You have to execute the entire sequence quickly! If nothing “strange” happens, just press “STOP” and redo it.

    • If everything is done, you should see “TECH MODE“ in the display of the printer;
    • Press the “MENU” button, follow these steps: DATA SETUP -> FLASH UPGRADE -> LOCAL, then press “OK”;
    • Go back to your computer: you’ve to drag and drop the file we created before (FIX_SCX4300_V1.13_Fact_romdl.hd) to the icon named usbprns2.exe)
    • The display on Samsung SCX-4300 should say:
      - Data receiving
      - Flash erasing
      - Flash Programming
      - Checksumming
      - Download Ok
    • Then the printer will reboot. You unlocked it!
    • When the printer is ready, just repeat the sequence you used before to enter the “TECH MODE” and follow these steps: DATA SETUP -> CLEAR COUNTERS -> CLEAR ALL CNT.
    • The status LED on the printer should become yellow, then finally green. Now you can print again, using all the remaining ink!

    Gtalk Tips N Tricks | Gtalk Cheats


    Gtalk cheats | Useful Gtalk tips and tricks | complete Gtalk cheats
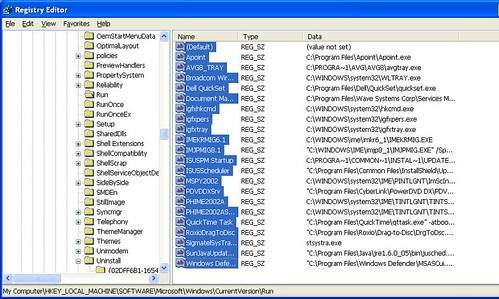
    You can edit most settings by opening regedit (start -> regedit),
    and navigating to the key HKEY_CURRENT_USER\Software\Google\Google Talk.

    The "Google/Google Talk" key has several sub-keys that hold different option values:
    Accounts:

    This one has sub keys for each different account that has logged in on the client. These keys have different values that store the username, password and connection options.

    Auto update: Stores the current version information. When the client checks for updates it compares Google's response with these values. If an update is needed, it will download and update the new version.

    Options: This is the most interesting part, where most of the current hacks should be used (keep reading).

    Process: Stores the process ID. Probably used by Google Talk to detect if it's already running or not.

    1.) HKEY_CURRENT_USER\Software\Google\Google Talk\Options\show_pin
    If 1, shows a "pin" next to the minimize button that keeps the windows on top of all the other open windows when clicked.
    2.)HKEY_CURRENT_USER\Software\Google\Google Talk\Options\view_show_taskbutton
    If 0, hides the taskbar button, and leaves the tray icon only, when the window is shown
    3.)HKEY_CURRENT_USER\Software\Google\Google Talk\Options\away_inactive
    If 1, status will be set as Away after the specified number of minutes.
    4.)HKEY_CURRENT_USER\Software\Google\Google Talk\Options\away_screensaver
    If 1, status will be set as Away after the specified number of minutes.
    5.)HKEY_CURRENT_USER\Software\Google\Google Talk\Options\inactive_minutes
    Number of inactive minutes to become away if auto-away is on.

    More Tips & Tricks
    Change the font size -

    While holding the control key, move the scroll wheel on your mouse either up or down. This trick works while being focused in either the read or write area.

    Insert line breaks - If you want to have a message that spans multiple paragraphs, just hold shift and hit enter. You can add as many new lines as you want to create

    Bold Text - To write something bold, you can use an asterisk before and after the word, like *this* .

    Italic Text - To use italics, use an underscore before an after the word, like _this_ .

    Switch windows - Hitting tab will cycle through open windows. It will select minimized conversations, to expand them just hit enter. If you just want to cycle through IM's and don't care about the buddy list, control-tab will do that and will automatically expand a minimized conversation if you settle on one.

    Invitation Tips - You don’t need to say Yes or No when someone wants to add you as a friend; you can simply ignore it, the request will go away. (On the other hand, someone with whom you chat often will automatically turn to be your friend, unless you disable this in the options).

    Show Hyperlinks - You can show your homepage or blog URL simply by entering the it in your away message (at the top of the main window). It will automatically turn to a link visible to others.
    A message can be 32767 characters long.

    How To Conference Calls : What you need to do to have conference calls: Open up a copy of Google Talk on all computers with which you wish to conference. After one copy is opened make a new shortcut for Google Talk but at the end of it add /nomutex. If you installed it to the default folder then your shortcut should read "C:\Program Files\Google\Google Talk\googletalk.exe" /nomutex. Open 2nd instances of the software on every user's computer.

    After this start a chain:
    1. User 1 should connect on one instance to user
    2. User 2 will connect on his second instance to user
    3. User 3 will connect using his second instance back to user 1.
    With this chain everyone is connected to everyone.

    Keyboard Shortcuts Ctrl + E - It centralizes the selected text, or the current line.
    Ctrl + R - It justifies to the right the selected text, or the current line.
    Ctrl + L - It justifies to the left the selected text, or the current line.
    Ctrl + I - The same thing does that Tab.
    Tab - It is giving the area to each of the windows opened by Google Talk.
    Ctrl + Tab - The same thing does that Shift + Tab .
    Shift + Tab - The same thing does that Tab but in reverse.
    Ctrl + Shift + L -Switch between points, numbers, letters, capital letters, roman numbers and capital roman numbers
    Ctrl + 1 (KeyPad) - It does a simple space between the lines.
    Ctrl + 2 (KeyPad) - It does a double space between the lines.
    Ctrl + 5 (KeyPad) - A space does 1.5 between the lines.
    Ctrl + 1 (NumPad) - It goes at the end of the last line.
    Ctrl + 7 (NumPad) - It goes at the begin of the last line.
    Ctrl + F4 - It closes the current window.
    Alt + F4 - It closes the current window.
    Alt + Esc - It Minimize all the windows.
    Windows + ESC - Open Google Talk (if it's minimized, or in the tray)
    F9 - Open Gmail to send an email to the current contact.
    F11 - It initiates a telephonic call with your friend.
    F12 - It cancels a telephonic call.
    Esc - It closes the current window.

    If you have several Google Gmail accounts you also may want to run multiple instances of Google Talk This is especially important for families that share a single PC. Nothing worse than a family member signing you out so they can sign in under their own account!

    Basically, to have "Google Polygamy" you need to run Google Talk with the following switch: /nomutex
    Step 1: Right-click on the desktop
    Step 2: Select New
    Step 3: Select Shortcut
    Step 4: Paste this into the text box:
    "c:\program files\google\google talk\googletalk.exe" /nomutex
    Step 5: Click Next and choose a shortcut name such as Google Talk1, Google Talk2, or something related to your Gmail account for easy remembering which account is which.
    Step 6: Click OK

    More parameters for Gtalk Start -> Run Here’s a complete list of what you can do with Gtalk in run command prompt.
    "C:\Program Files\Google\Google Talk\googletalk.exe" /parameter
    /nomutex: Open more than 1 Gtalk.
    /autostart: Check the registry settings to see if Gtalk needs to be started. If the “Start automatically with Windows” option is unchecked, it won’t start.
    /forcestart: Similar to /autostart, but forces Gtalk to start.
    /S upgrade: Used when upgrading Google Talk
    /register: registers Google Talk in the registry, includig the GMail Compose method.
    /checkupdate: check for newer versions
    /plaintextauth: uses plain authentication mechanism instead then Google’s GAIA mechanism. Used for testing the plain method on Google’s servers.
    /nogaiaauth: disables GAIA authentication method. The same as above.
    /factoryreset: set settings back to default.
    /gaiaserver servername.com: uses a different GAIA server to connect to Google Talk. Used for debug purposes only, there are no other known GAIA servers.
    /mailto email@host.com: send an email with Gmail
    /diag: start Google Talk in diagnostic mode
    /log: probably has something to do with the diagnostic logging
    Adding a web URL in custom message will result it to be clickable.
    Gtalk supports these following emotions and they are in blue colors
    :-| :-O :-x :-P :-D ;-) :-( :| :x ;-| ;-O ;-x ;-P ;-D ;-) ;-( ;| ;O ;x ;P ;( B-| B-O B-x B-P B-D B-) B-( B’( BO Bx BD B) B( B)
    Gmail talk supports these following emotions and they are animated
    :-| :=P :-D ;-):-( ;-) B-)

    Trick to Increase your internet Speed


    Here i will show you the simple trick to increase the speed of your internet connection in the network.

    Kommt durch jede Tür
    Follow the simple step illustrated below:-
    Go to desktop->
    My computer-(right click on)->properties->
    go to HARDWARE tab->
    Device manager->
    Now you see a window of Device manager then
    go to Ports->
    Communication Port(double click on it and Open).
    After open you can see a Communication Port properties.

    Go the Port Setting: Now increase your "Bits per second" to 128000 and change the “Flow control” to Hardware.

    That's it Apply and see the result.

    DIVX via XBOX / HDTV


    Setup your Xbox 360 over the network and with the help of Window player 11 you can share all the Divx movies over the network and watch them on your HDTV or regular TV


    Setup Diagram

    Prerequisites:
    1. High Speed Internet

    2. Windows XP or Vista with Windows Media Player 11 Installed with usual Divx codec.

    3. Home network should have been setup through My Network places. (I think more users know how to do it)

    4. Make sure your Xbox 360 is turned on and connected to your home network by wired

    Setup from PC


    1. Windows Media Player 11
    2. Click the Now Playing button at the top of the Windows Media Player 11 interface and choose More Options.
    3. On the Library tab of the Options, click Configure Sharing.
    4. Check the box next to Share my media to, and then select your Xbox 360 and click
    5. Allow, so that there's a check mark on the Xbox 360 icon instead of a warning sign. Note: If you get an error message about your network, follow steps to set your network from Public to Private.


    Setup from XBOX 360:
    1. On the Media blade on your Xbox 360, choose Videos, and then hit the X button to Change Video Source.
    2 Select your computer from the list of choices.
    3. You can now browse your computers music, photos and videos.
    4. Depending on how your files are encoded, you may be prompted to download an additional free update for AAC playback with some files ( If you signed in via free Xbox live account)
    Conclusion:
    This will really help a lot to watch all the movies you are downloading on your TV. Before I used to transfer the file to USB and play in my Divx Player.

    4G technologies: WiMAX and LTE


    silent night #14G has been causing quite a stir lately and this is to be expected, given many carries have already revealed plans to embark on 4G in the coming months, not to mention some of them have a head start, having deployed the necessary infrastructure. Actually, do we know what 4G offers?

    Let’s take a closer look at the most important aspects of 4G and delve deeper into the specifics of its two representatives, WiMAX and LTE. We are not planning to use words like megahertz, gigahertz, channels and architecture or elaborate on technical details, because we bet most customers are far more interested in what they will be getting in real life, rather than the technical details behind it.
    Before we get to down to brass tacks, however, let’s first talk about...

    3G networks today
    The third generation mobile telecommunication networks (UMTS, CDMA EV-DO) first took off back in 2001 in Japan (2003 in the USA). All told, they allow for much faster data transfers and made possible the wide adoption of services like video calls (in Europe), video sharing (on AT&T) as well as VoIP.

    4G and faster speeds
    For the sake of accuracy, we have to point out that neither WiMAX, nor LTE, as they exist today, meet the full requirements of the 4G standard. Still, they offer quite a bit more than contemporary 3G networks. Of course, the most important aspect here is data transfer and we are talking about download and upload speed that is 2-3 and even more times faster alongside of 3G at its best. In other words, you can do more things on a 4G device, say, watch HD videos online, have high quality calls over the Internet, use a handset as a Wi-Fi modem, etc. Moreover, the improved throughput allows for comfortable use of one and the same network cell by up to ten times more people, so service failures are less likely to happen even in peak usage scenarios. The good thing about 4G with this respect is if you happen to be in area with overlapping coverage provided by several cells, you will get higher download and upload speeds.
    So, that’s about all when it comes to the fundamentals of 4G. Now, let’s delve deeper into...

    WiMAXJournée LTE Ericsson / TeliaSonera - Stockholm - Mai 2010
    If you think there is something in common between WiMAX and Wi-Fi... well, you are right to an extent. They both allow for wireless connectivity, but WiMAX is functional over much greater distance (miles) and is based on IEEE 802.16, while Wi-Fi utilizes a different standard - IEEE 802.11. Theoretically, the former allows for download speeds of up to 40Mbps, although the peak throughput has been found to be around 6Mbps in real life (according to data by Clearwire). One of the greatest advantages of WiMAX is that the necessary infrastructure is already in place in a few countries.

    At the time being, the technology is usable unless your relative speed exceeds 75mph. This is not much of a stumbling block really, since you will hardly ever need to use the internet while flying on the road, but still, LTE networks are free from such a limitation. Another disadvantage of WiMAX is its relatively high latency at data transfers and this is bad news for avid gamers wanting to playing fast-paced online games in real time.

    LTE
    The technology is actually quite similar to the existing 3G networks and will probably manage to outrival WiMAX... in the future. It’s taking its first steps and although the overwhelming majority of carriers around the world are intent to cast their lot in with LTE, there is still not even one finished project, not to mention most carriers are still at the initial stage of the infrastructure deployment process.

    LTE seems to have turned the tide in its favor since it offers certain advantages over WiMAX. In theory, the technology is capable of delivering download speeds in the order of 70Mbps (Nokia-Siemens), although we highly doubt it that we will see something better than 5-12Mbps in real life, depending on the number of cells and particular region. Still, lab tests indicate the overall network latency is about five times lower, plus LTE remains fully usable even for people moving at a speed of 220mph. The technology seems better suited for phone calls as well, since it allows for algorithms that are similar to those used with 3G networks today, while WiMAX relies on data transfer based on standard that resembles VoIP.

    Handsets of the future
    It’s only logical that with WiMAX networks already deployed in certain countries, we get to see more and more handsets that support the technology. The HTC EVO 4G makes for an illustrative example - the cell phone is rolling out on Sprint in the US this summer. However, there are still just a handful of devices capable of utilizing the technology and most of them are built into modems and laptops.

    It seems we are about a year away from getting our hands on the first handsets to support LTE. Most major companies in the sector have already joined the LTE camp, so it seems certain that we will see a great number of thrilling devices in the near future.